Thursday, December 28, 2017
Vanity... but in a good way!
So... I got a new purchase in the workroom today. An old workbench.
This will be our new OLD vanity. We are doing a master bedroom and bathroom remodel and I have been sourcing and pricing all things necessary for the job.
We are continuing with a little bit farmhouse-meets-rustic design. I had been online looking at 60" wide vanities and most of the ones we really liked were in the $1500 range - without sink or top!
Well, we talked about building one from scratch, something that we can do in our sleep, but even that wouldn't have a history or look truly worn and used.
Phillip and I were shopping at a collector's store a few days before Christmas looking for a gift for a Glamper breakfast gift swap. As I'm looking at holiday things, and vintage things, and cool collector things, I hear Phillip call my name.... "Oh....Tina...."
I round the corner, and practically buried under a TON of stuff, is THIS workbench.
A crusty, warped, paint covered, workbench... complete with vise holes!
I got out the measuring tape... and yep! PERFECT height, width, depth.... and without that LAST zero in the price.
Now, keep in mind, we BOTH think it is AWESOME!!! The wood is true, dimensionally cut lumber. You can still see the cut marks. The nail holes. The age. The patina.
Are we crazy? Maybe. But it will make a nice, warm statement in the new bathroom.
The top will get glued and clamped. Then sanded a bit, but not a lot, so we will still see its marks of history. Then stained a nice, rich, dark walnut and clear-coated.
The body and legs will be either primed and painted with lightly distressed edges, or possibly stained a rich aqua... jury is still out on that. White paint will certainly look amazing, but the aqua stain will still allow all the nail holes, scratches, dents, etc to shine through.
The bottom shelf center is open. We talked about planking it, but then decided to break and roll a sheet of galvanized for the opening.
Well.... as we were standing in my studio bay, I looked over and saw THIS!
Hmmmm.... I wonder.....
I had Phillip grab it and hand it to me.
Guess what?
YEP!
A P.E.R.F.E.C.T fit.
I'll need to source and rust up a few more springs to make it super taut, but,
WOW!
Add THREE locker baskets... and Voila!
I'm pretty excited... and have many $100 bills left in my budget for other things... like a heated bathroom floor!
...and THIS sink!
Yay!!!!
Tuesday, November 7, 2017
Locker Basket Love
How about a flash from the past?
Sometimes you find things sitting on the side of the road...and well....you just rescue them.
These three children's school chairs were an ugly sort of gray-pink... not too cute... and a complete flash back to the .... 80's? 90's? Who knows. BUT.... the rusty, aqua patina of the legs had me at HELLO!!!
I tried a can of new-fangled, sure-to-stick to plastic, rattle can spray paint. Guess what? No sticky to this molded plastic. It did not even try.
So, plan B.... and if I have to be honest, this shade of TEAL was not doing it for me anyway.
Remove the ugly, gray-pink, chippy teal seat and seat back.
Now that I have three nekked chairs, let's try and morph three vintage locker baskets and three vintage, brass door plates (thanks, ReStore!) to the mix.
Kinda liking this vibe.
Hmmmm... working so far.
Yes. Me likey! A LOT!
So did other people too.
I put two up for sale in my booth at Barnstormer's Vintage Fair a few years ago and now I have ONE lonely chair basket. I still likey! A LOT!!!
Wednesday, November 1, 2017
Folly
Flashback to December 2012.
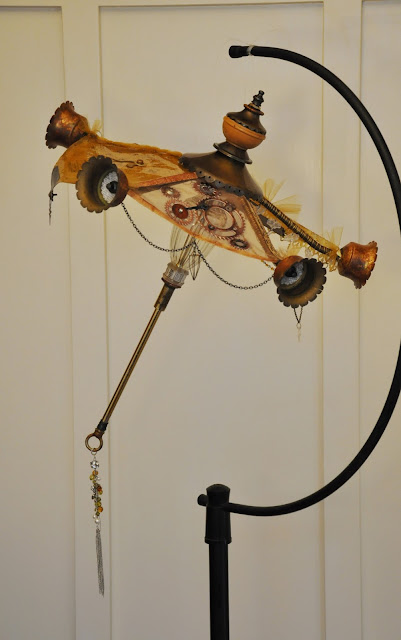
Coming up on 5 years ago, I was sitting at the dining room table tearing apart two old chandeliers in order to rebuild something to enter into Spellbinders Craft to Win contest for CHA in Anaheim, showcasing use of their dies.
Coming up on 5 years ago, I was sitting at the dining room table tearing apart two old chandeliers in order to rebuild something to enter into Spellbinders Craft to Win contest for CHA in Anaheim, showcasing use of their dies.
Well, after collecting a plethora of stuff, this is what won me 2nd Place.
This was a fun project. Enjoy.
...and for your viewing/reading pleasure.... here are the behind the scenes HOW TO.
Subscribe to:
Posts (Atom)


